Search Results
7/18/2025, 9:43:03 PM
>>96123708
For anyone who might be wondering, the method basically goes.
1. Lay down a base coat of a steel metallic on the areas you will be applying the chrome. I use AK interactive natural steel, but any sort will work. Allow to dry and cure. I usually give it a day or two, may not be necessary but I do it.
2.lay down base coat on non-metallic parts. If you're going to do any dry brushing anywhere near the metal, this would be a good time to do it. You could also shade and highlight here but I generally wait until after the chrome is applied in case there is spillover and a cover up is necessary.
3. With the metallic parts cured, take the chrome marker (AK interactive makes some, steel chrome is good but the others spoil quickly even when sealed) and apply it over the metallics you intend to. Do your best not to slash into or disturb the stuff you have laid down already if you want a perfect finish. I usually go up and down like mowing a lawn. If you are doing a shield or flat surface and it appears uneven don't try to even it out immediately. Wait until it cures and re-apply it, focus on the problem areas. However, you can also create the appearance of battle damage or chinks in the armor by giving it a little poke or "slash" with something while still wet. Brass rod, hobby knife etc. Cure 72 hours.
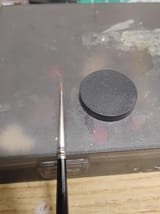
3. Now what you want to do is mix some black ink (AK is good, again.) and a universal thinner. I use AK interactive 3rd gen universal thinner, it works really well for pinwashes. Then you take a very thin long bristled brush (pic rel, 25mm base for scale) and directly shade the crevices and recesses with the ink pinwash. Normal washes will not work for this purpose because they are not opaque enough to create those distinct lines. You can use them to create a weather appearance on parts though. Let the ink cure and dry.
4) Coat the armor with high gloss varnish or a shine enhancing varnish (I use gauzy agent)
Have a good one bros
Page 1
