Here is a quick guide for how I build these palisade ramparts. This post will outline the supplies and tools and in the next few I will go through the simple process.
Tools used
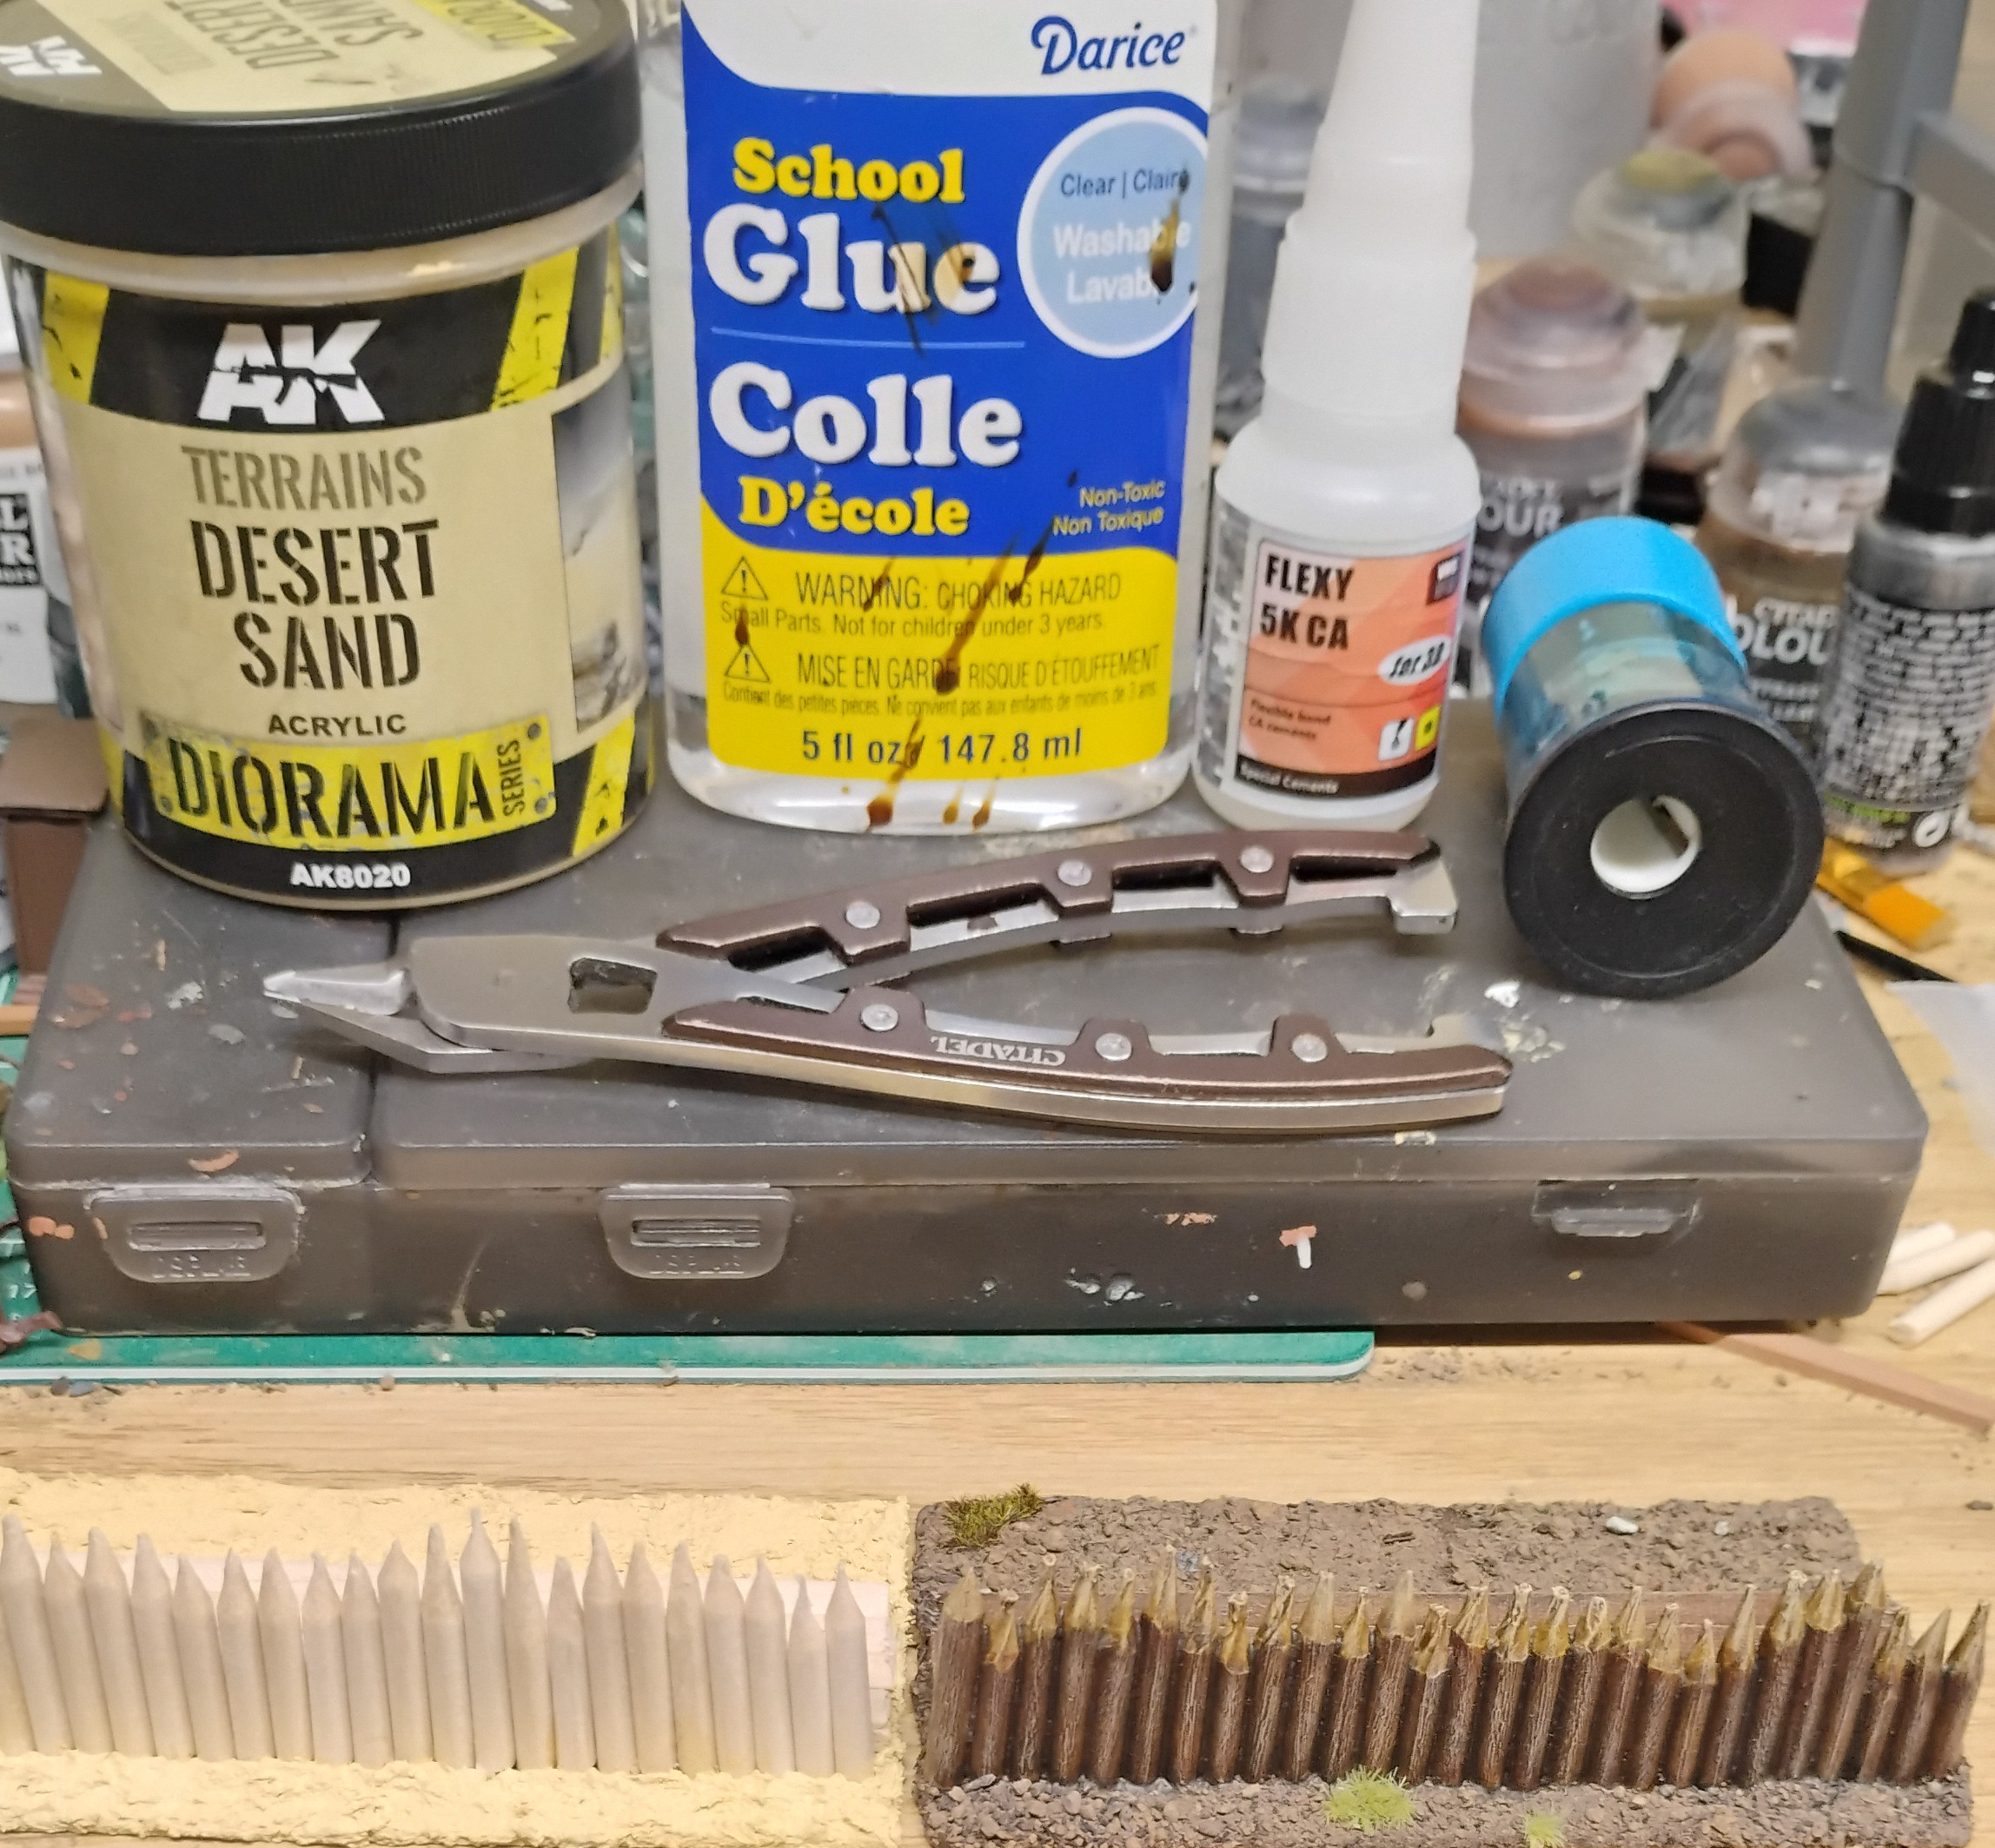
>Cutting tool
Anything will do. If you want perfect edges use a hobby saw and sandpaper, mitre box would help. Here I just used some busted old sidecutters for all of it.
>Pencil Sharpener
For sharpening the dowels, you could also whittle them off if you're a whittler type but that would be much more time consuming
Supplies required
>Basing of your choice
I would recommend the renedra bases if you want to make something modular, they've got bases all the way up to 210mm frontage and a variety of other square bases in many different measurements that you could use to extend the fortifications inward or outward. Also they are perfectly flat and won't warp on you. Use whatever you like, though
>Wooden Dowels (circular and optionally squared)
These are cheap and plentiful and available at just about any dollar or craft store. These circular ones seen here are about 0.5 cm by 30cm. They are a dollar for 20 or so at Dollarama. I think they are a good scale for a smaller 28mm fortification. They have many different sizes available if you want to go bigger, these will fit in a standard pencil sharpener though. I use squared dowels for the rampart floor, you could use rounded ones if you prefer it as well. Same deal there, cheap and widely available.
>Wood Glue
>Super Glue
>Texture paste of your choosing.
>Sealer, thinned PVA works, I recommend Vallejo polyurethane varnish though as it is much more durable and has a better finish which doesn't require priming.
>Paints and weathering products, basing mix/tufts of your choice
Also some sticky tack or dried tack glue balled up will come in handy and I would recommend it for the assembly phase.